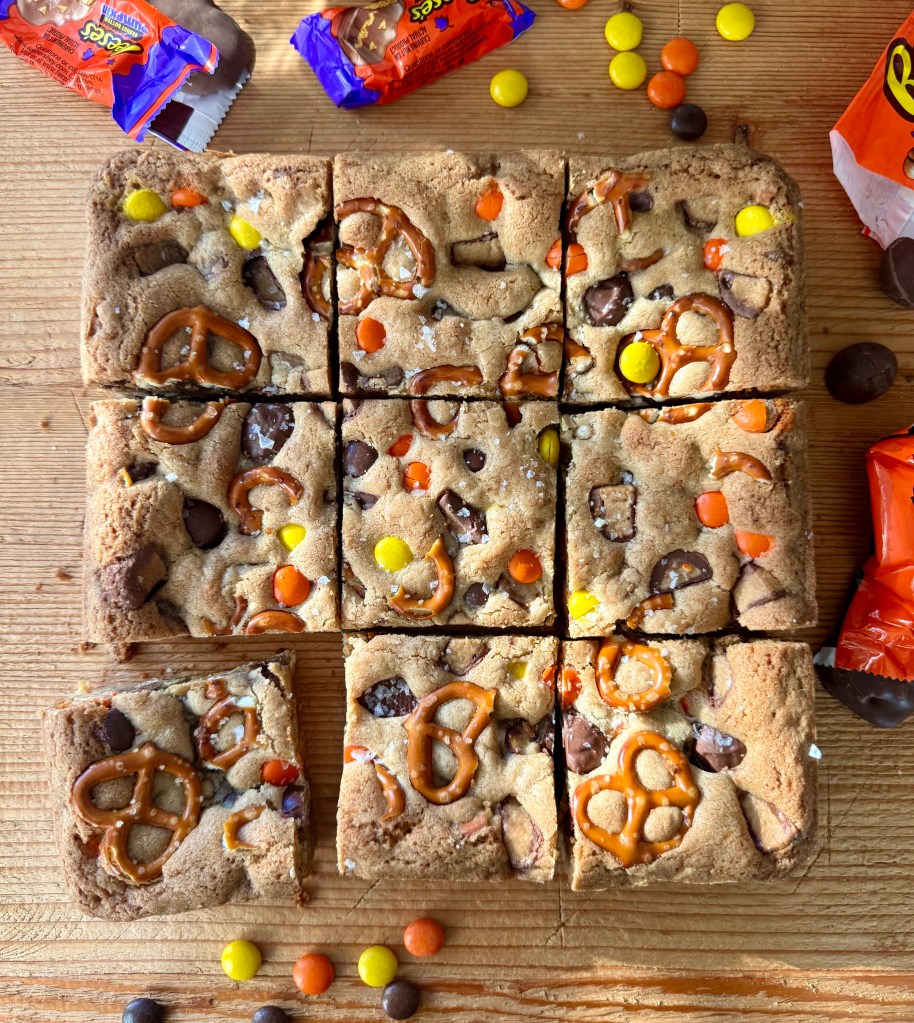
LEFTOVER HALLOWEEN CANDY COOKIE BARS

I find that Halloween usually goes one of two ways. Either you get a slew of little ghosts and goblins and you’re out of candy 30 minutes in, or you’re staring down a giant basket of Reese’s, Kit Kats and Twix at the end of the night, wondering where the heck all the kiddos went.

These leftover Halloween candy cookie bars are for the latter.

They start with a stir-together brown sugar cookie base (one bowl, no mixer, thank you very much) that you can load up with whatever chocolatey candy you’ve got lying around. I leaned heavy into the Reese’s. Mini pumpkins, Take 5 bars (my fave) and Reese’s Pieces all went into the dough, with a few pieces saved for sticking on top. I also threw in some pretzels, because I’m a sucker for salty-sweet and why not?

The result is a thick, chewy bar with golden edges, gooey pockets of peanut butter and enough crunch to keep things interesting. They cut clean, stack nicely in a tin and travel well, so you can send the candy (in its new and improved form) right out the door to neighbors, teachers or the office break room. And nobody has to know they started as the bottom of a trick-or-treat bag.

What’s the best leftover Halloween candy for cookie bars?

Honestly? Whatever you’ve got. But a few tips from my testing:

  • Chocolate and peanut butter candies are the MVPs. Reese’s cups and pumpkins, Snickers, Twix, Milky Way, Kit Kats, M&M’s and Reese’s Pieces fold in well and bake up nicely.
  • Caramel is your friend. Snickers, Twix, Milky Way and Take 5 bars melt into gooey little caramel pockets.
  • Skip the fruity stuff. Skittles, Starburst and anything sour or chewy tend to go hard and sticky in the oven. Save those for the lunchbox.
  • Mix textures. A little crunch (pretzels, Kit Kats, Butterfinger) keeps every bite from tasting the same.

You’ll want about 1½ to 2 cups of chopped candy total. For reference, I used 6 fun-size Reese’s pumpkins, 4 fun-size Take 5 bars and ½ cup of Reese’s Pieces.

Why a cookie bar instead of a blondie?

I went back and forth on this one. Blondies are dense and fudgy, and they depend on pulling them from the oven at the exact right gooey moment. Cookie bars have a little more flour, so they bake up chewy and sturdy, with crisp golden edges. That extra structure is what lets them hold a LOT of chunky candy without sinking or turning greasy. They’re also more forgiving to bake, which is exactly what I want in the post-Halloween fog.

Tips for the best candy cookie bars

  • Save some for the top. Pressing a few pieces of candy and a handful of whole mini pretzels on top before baking makes them look bakery-pretty with minimal effort.
  • Don’t overbake. Pull them when the edges are golden and set and the center still looks a little underdone. My first batch was done at 22 minutes, so start checking at 20.
  • Check your pan. Pan sizes are measured across the top. If yours is an 8×8, the bars will be thicker, so add about 5 minutes and watch for those golden edges.
  • Be patient. Let them cool completely (yes, the full 1½ hours) before cutting. Warm cookie bars fall apart, and the melty candy needs time to set.
  • Finish with flaky salt. Optional, but it makes the peanut butter and chocolate sing (as Nigella would say!).

Leftover Halloween Candy Cookie Bars

Chewy brown sugar cookie bars loaded with leftover Halloween candy and pretzels. One bowl, no mixer.

Makes: 16 bars (or 9 extra-large bars) · Prep: 15 minutes · Bake: 20 to 25 minutes · Cool: 1½ hours · Pan: 9×9-inch

Ingredients

  • ¾ cup (170g) unsalted butter, melted
  • 1¼ cups (250g) packed light or dark brown sugar
  • 1 large egg + 1 large egg yolk, room temperature
  • 2 tsp vanilla extract
  • 2 cups (250g) all-purpose flour
  • ½ tsp baking soda
  • ½ tsp kosher salt
  • 6 fun-size Reese’s pumpkins, chopped
  • 4 fun-size Take 5 bars, chopped
  • ½ cup Reese’s Pieces
  • ½ cup chopped pretzels, plus a handful of whole mini twists for the top
  • Flaky salt, optional

Instructions

  1. Heat the oven to 350°F and Line a 9×9-inch pan with a parchment sling.
  2. In a large bowl, whisk the melted butter and brown sugar until smooth. Whisk in the egg, yolk, and vanilla.
  3. Using a silicone spatula, fold in the flour, baking soda, and salt until just a few streaks remain.
  4. Gently fold in the Take 5, about ¾ of the pumpkins and Reese’s Pieces, and the chopped pretzels.
  5. Using your hands, press the dough evenly into the prepared pan. (It will be thick.) Press the remaining candy and the whole pretzel twists on top. Sprinkle with flaky salt, if using.
  6. Bake 20 to 25 minutes, until the edges are golden and set and the center still looks slightly underbaked.
  7. Cool completely in the pan, at least 1½ hours, before lifting out and cutting into bars.

Swap it: Use 1½ to 2 cups of any chopped chocolate or caramel candy in place of the Reese’s.

How to store candy cookie bars

Keep them in an airtight container at room temperature for up to 4 days. Heads up, the pretzels inside the bars soften by day two, while the ones on top stay crisp. To freeze, wrap the bars individually and tuck them in a freezer bag for up to 3 months. Thaw on the counter before eating (or don’t, I won’t judge).

Leftover candy cookie bar FAQ

Can I use any kind of Halloween candy? Most chocolate, peanut butter and caramel candies work great. Skip hard candy and fruity chews, which turn sticky and hard in the oven.

Can I make these in an 8×8 pan? Yes. The bars will be thicker, so add about 5 minutes to the bake and look for golden, set edges.

Can I double the recipe? Absolutely. Bake it in a 9×13-inch pan and start checking around 25 minutes.

Do I need a mixer? Nope. Everything gets stirred together in one bowl with a whisk and a spatula.

Why are my bars falling apart? They probably needed more cooling time. Give them the full 1½ hours in the pan before you cut.


If you make these, shoot me a message and let me know what you tossed in! And if you’re looking for more ways to use up that candy stash, try a build-your-own sundae bar, candy-loaded brownies or loaded caramel apples.
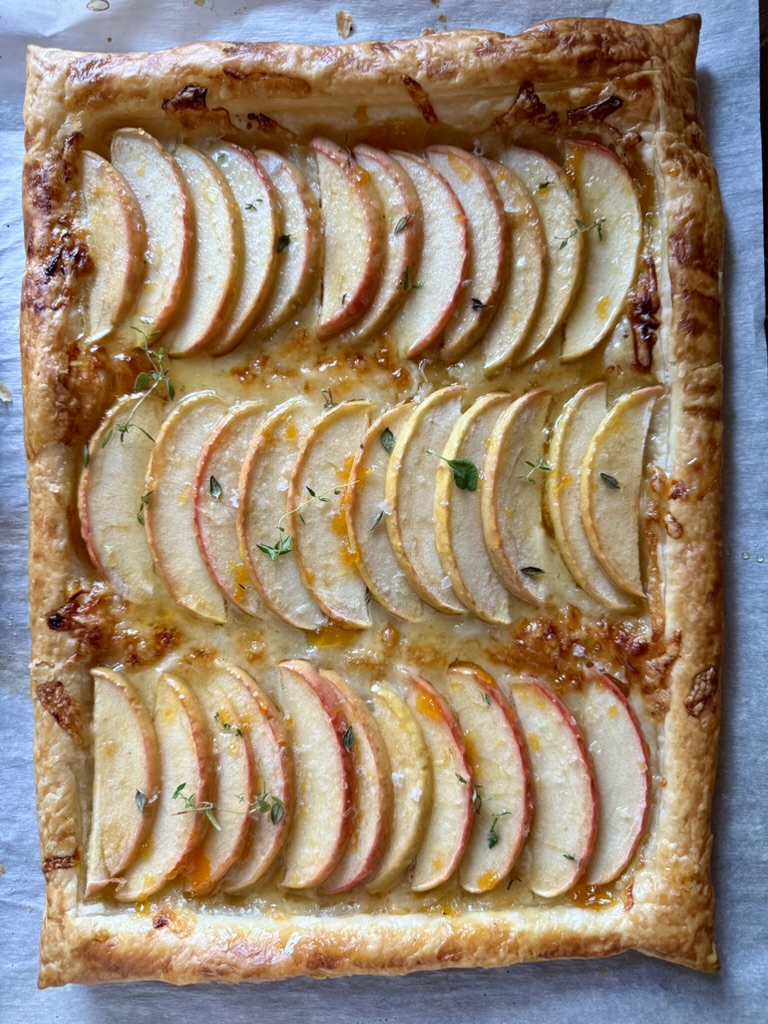
White Cheddar Apple Tart

Something magical happens when sweet-tart meets salty-sharp, and a stunning—yet surprisingly easy—apple-cheddar puff pastry tart is the perfect way to showcase the combo. Think of this “recipe” more like a blueprint. Once you’ve got the formula down (pastry + cheese + apples + a little something on top), you can take it wherever you want.

Prep: 10 minutes | Bake: 20 minutes | Serves: 12

Ingredients

  • 1 sheet frozen puff pastry (half of a 17.3-oz. package), thawed
  • 1 egg, beaten with 1 Tbsp. water, for egg wash
  • ¼ cup apricot preserves, divided
  • 3 oz. sharp white cheddar, shredded (about ¾ cup)
  • 1 large firm apple (Honeycrisp, Pink Lady, or Granny Smith), cored and thinly sliced
  • Fresh thyme leaves

Instructions

  1. Preheat the oven to 400°F. Line a baking sheet with parchment.
  2. Unfold the thawed pastry onto the baking sheet. Using a paring knife, score a 1-inch border around the edges, cutting only partway through the pastry. Brush the border with the egg wash.
  3. Using an offset spatula, spread 2 tablespoons of the preserves over the pastry inside the border. Sprinkle the cheddar over the preserves.
  4. Arrange the apple slices over the cheese, overlapping them slightly.
  5. Bake for about 20 minutes, until the border is puffed and deep golden brown.
  6. Microwave the remaining 2 tablespoons preserves with 1 tsp. water for 15 to 20 seconds, until runny, and strain if chunky. Brush the glaze over the apples while the tart is hot.
  7. Sprinkle with thyme, cut into 12 pieces, and serve warm or at room temperature.

Notes

If your apples are small, you might want to use two to fill out your tart. Have a couple on hand just to be safe. Enjoy snacking on any leftovers.

It’s best to thaw the pastry overnight in the refrigerator so it unfolds without cracking. If you’re crunched for time, you can also leave it out on the kitchen counter for about 40 minutes.

Fall Harvest Grazing Board

How to Put Together a Fall Grazing Board

I’m finally starting to change out my summer closet for fall. Goodbye flip flops, cutoffs, and tanks. Hello boots, cozy socks, and cable knits. But my closet isn’t the only place I’m turning over a new leaf for the season. My grazing boards are getting a fresh look for fall, too.

I love me a grazing board. It’s artful, it’s delicious, and it’s easy to change up based on the time of year or occasion. This cozy fall grazing board will add a touch of seasonal magic to your table. Here’s the blueprint to creating your own at home:


1. Start with the Stars of the Season: Apples, Pears, and Pumpkins

These three fall staples will be the stars of your grazing board, bringing a combination of sweet, tart, and savory notes.

  • Pears: Try ripe Bartlett or Bosc pears. Their soft, juicy texture pairs beautifully with savory cheeses and salty nuts. Slice them thinly or quarter them for easy snacking.
  • Apples: Honeycrisp and Granny Smith apples are great choices. Honeycrisp adds a sweet, juicy crunch, while Granny Smith brings a refreshing tartness. Slice them into wedges, and leave the skin on for added color and texture.
  • Pumpkins: Mini pumpkins make for beautiful decorations on the board, but you can also use pumpkin in edible ways! Roast pumpkin slices with olive oil, salt, and herbs for a savory bite, or incorporate pumpkin-flavored items like pumpkin hummus or spiced pumpkin seeds.
  • Bonus: FIGS! If you’ve never had a fresh fig, now is the time! They’ve got this jammy texture and honeyed sweetness that’s to die for. I love them paired with goat cheese and a drizzle of honey. (And I’ll also eat them for breakfast with a dollop of plain Greek yogurt, honey, and nuts. Yum yum yum.)

2. Choose Seasonal Cheeses

No grazing board is complete without cheese, and autumn is the perfect time to indulge in rich, creamy varieties. Consider including:

  • Brie or Camembert: Their creamy textures make a wonderful complement to fruit. Try brie topped with roasted grapes for an unexpected combination.
  • Sharp Cheddar: The sharpness of an aged cheddar balances well with tart apples and it’s delicious with pumpkin butter, too. I love Prairie Breeze, a white cheddar from Milton Creamery in Milton, Iowa that has a touch of sweetness. So good.
  • Blue Cheese: If you’re looking for something bold, blue cheese is where it’s at. Pair it with pears, walnuts, and hot honey for a salty-sweet-hot bite.

3. Incorporate Crunchy, Savory Elements

Think about combining different textures and flavors. To balance the sweetness of the fruit and the richness of the cheese, add a few of the following:

  • Nuts: Pecans, walnuts, or almonds are fab for fall. You can roast them with a bit of maple syrup or spices for an extra touch of fall flavor (plus, they’ll make your house smell incredible).
  • Crackers and Bread: Choose a mix of crunchy seeded crackers and soft, rustic breads. You can also toast up some baguette slices so guests can make their own crostini with all the board’s elements.
  • Cured Meats: For some added savory flavor, include a selection of cured meats like prosciutto or salami. Prosciutto, in particular, pairs perfectly with sweet pears and apples.

4. Add Fall Condiments

Every board needs a condiment or two. They’re like that special little touch that brings everything together. Some ideas include:

  • Honey: A small dish of honey is a must, especially for drizzling over cheese and fruit. You can also try hot honey (I love Mike’s) for an unexpected touch of heat.
  • Apple Butter or Pumpkin Butter: Rich, spreadable apple or pumpkin butters add an extra layer of seasonal sweetness. Love them paired with sharp cheddar.
  • Fig Jam: My favorite addition to any board. It’s got a deep, earthy sweetness and is delicious with lots of cheeses. (Pro tip: you can often find a jar for like $4 at T.J. Maxx, Marshalls, or Homegoods.)

5. Garnish with Seasonal Flair

Your fall grazing board should be as visually stunning as it is delicious. For a rustic, seasonal look, add garnishes like:

  • Fresh Herbs: Rosemary sprigs or thyme branches not only look lovely, they also add a fragrant, earthy aroma to the board.
  • Mini Pumpkins and Gourds: Use small pumpkins, gourds, or colorful squash as decorative elements. They’ll add height, texture, and a true autumn vibe.
  • Edible Flowers: Scatter a few edible flowers or seasonal blossoms to bring a touch of the outside in.

Putting It All Together

Once you’ve gathered your ingredients, it’s time to assemble! Just remember that in the case of grazing boards, more is more. You want to fill every space. It’s all about abundance! Start by placing your larger items (like cheese wedges, bowls of condiments, or mini pumpkins) as focal points. You can also use small cake stands to add height and dimension to your display. Next, arrange the fruit slices and roasted pumpkin around the board in flowing patterns. Fill in all the gaps with crackers, nuts, and cured meats, and finish with your garnishes.

Remember, there’s no wrong way to build your board. Get creative and have fun!